vertigovu tattoo
placement photo guide
These days, it's not always necessary for artists to have their clients come in to take placement photos. Alternatively, these emailed photos are all guest artists will have to go on before they meet you. These instructions will help you take better reference photos, which will help me better design your tattoo.
It's very important that I receive proper photos because I use them to draw up designs based on how they will generally fit over the chosen area.
The Basics
All placement photos should be taken while standing upright with a flat-on view, not angled from above or below. Limbs should be held in a neutral position, not flexed or bent. When I apply the tattoo stencil your body will most likely be in this same position too.
This task will be easier if you set your camera/phone on a timer, prop it up on something then stand in front of it, or get a friend or family member to help you. Please avoid using mirror selfies as they usually result in the body having to twist or turn resulting in a non-neutral stance, this is not ideal for using the photo as a design template.
It will also be immensely helpful to me if you can take a photo with a clearly visible ruler or tape measure right next to the area you want tattooed. That way, I can get a very good sense of scale.
It's also not necessary to be fully nude. I just need to be able to see the area you want tattooed. If you have other tattoos in the area please be sure they are visible enough for me to understand the space I'm working with. If there are really tight areas for filler tattoos, I may get you to come in so I can do a tracing.


Usable vs. Unusable
Here are some examples of issues I've often come across. I haven't covered everything here but I hope it will give potential clients a good idea of what helpful references can be :)


-
✓ Left photo, usable: Shows the sternum and the torso. This helps me get a sense of scale when designing for this area.
-
x Right photo, unusable: It's taken way too close and there is no sense of the body shape.


-
✓ Left photo, usable: Shows an upright profile view of a thigh and a clear image of a tattoo that may need to be worked around.
-
x Right photo, unusable: Shows a thigh that is in a bent position which distorts its shape.


-
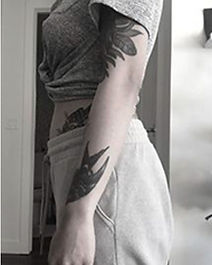
✓ Left photo, usable: Shows an upright profile view of an arm and also indicates the gap between tattoos. It may be helpful to include photos of the front of the arm to show any sections of the existing tattoos that wrap.
-
x Right photo, unusable: The angle is too extreme, making it hard to get any sense of scale or area shape.
-
No bent arms, please! I get so many of these and they are also not useful! Just relaxed hanging arms.


-
✓ Left photo, usable: Nice flat-on view of a calf
-
x Right photo, unusable: Too angled

-
Inner arms can be tricky. So far, I've found it helps to stick the arm out at a 90-degree angle with your palm facing forward.
How I use these photos/examples with measuring tools:
Here are a few examples of how I design stencils to fit the body shape.
The measuring tools help me get a sense of scaling which is very important for
determining the scale of the designs. This affects how detailed I can get with
your tattoo designs.
When using a measuring tool, please place it next to the area not right on top of it. I still have to be able to see where you want your tattoo! Below are some examples of A+ clients.


Thank you for helping artists out with your good reference photos! :D